Creating an AWS Lambda Function to Send Messages to SQS
Written on
Chapter 1: Introduction
In this guide, we'll walk through the process of creating an AWS Lambda function that sends messages to an SQS Queue. We'll utilize Python and the Boto3 library to achieve our objectives.
Objectives:
- Set up a Standard SQS Queue with Python
- Develop a Lambda function
- Adjust the Lambda function to transmit a message containing the current time to the SQS Queue
- Implement an API Gateway HTTP API trigger
- Test the trigger to confirm the message was sent successfully
A Word of Advice: If you're undertaking a similar project for educational purposes or a cohort, document your process concurrently. Delaying this task can result in the need to redo the project for effective writing. I encountered this issue after completing my project six weeks ago.

After executing the code, it will display a URL which we’ll revisit later. Now, log into your AWS console to verify the creation of the SQS Queue.

Fantastic! The queue has been created successfully, and it currently holds no messages.
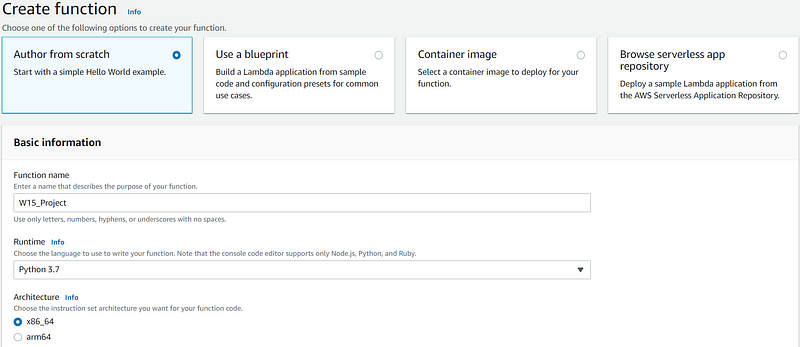
Next, let's create our Lambda function in the AWS console. Navigate to Lambda and click on “Create function”.

Choose the option to author from scratch, assign a name to your function, and select a runtime version. For this project, I opted for Python 3.7 or higher. After that, click on create function. We will create a new role using the default execution role, so no modifications are necessary here.

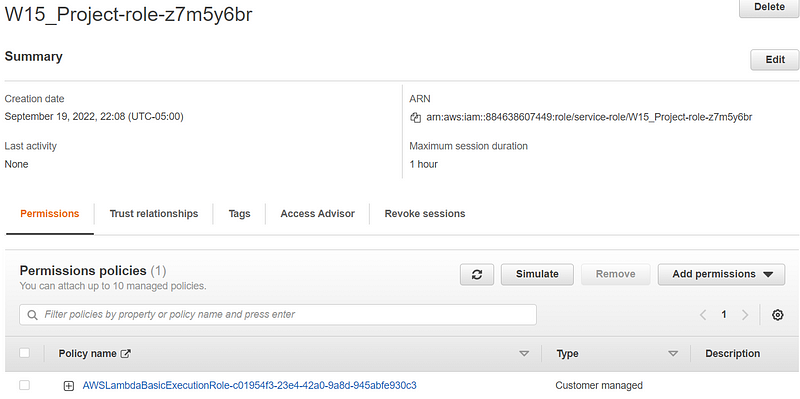
Now, navigate to IAM to set up our role. Begin typing the function name, and it should appear in the list. Select it.
Next, choose the corresponding policy name displayed.

You should now see the policy settings. Click on “edit policy” to add the necessary action and resource so that Lambda can send messages to SQS.
Once you click on edit policy, navigate to the JSON tab.
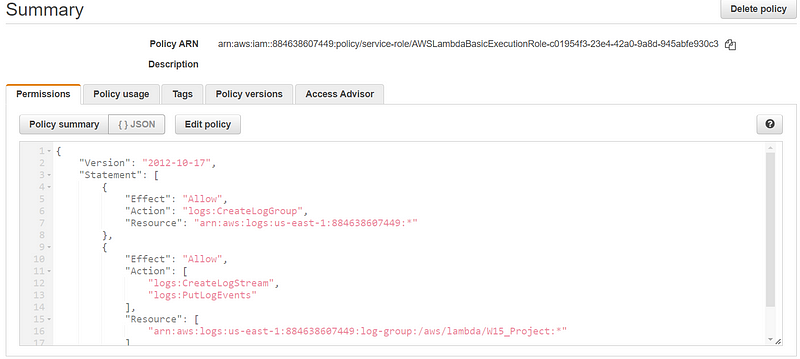
Before modifications, this is what you should see.
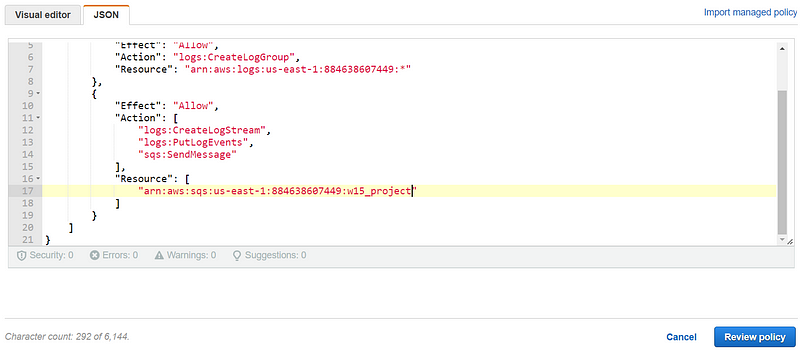
After adding the necessary action, adjust the resource ARN at the bottom, and then select review policy.
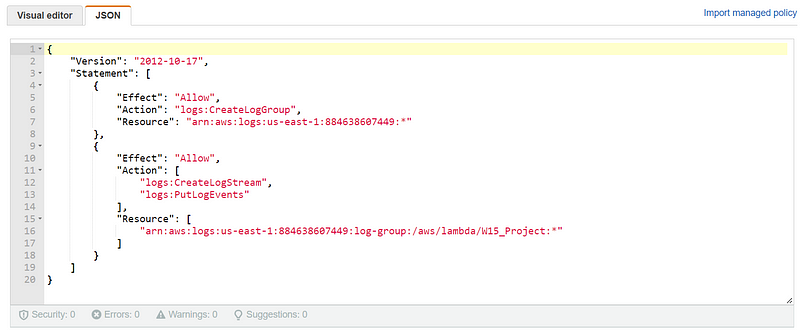
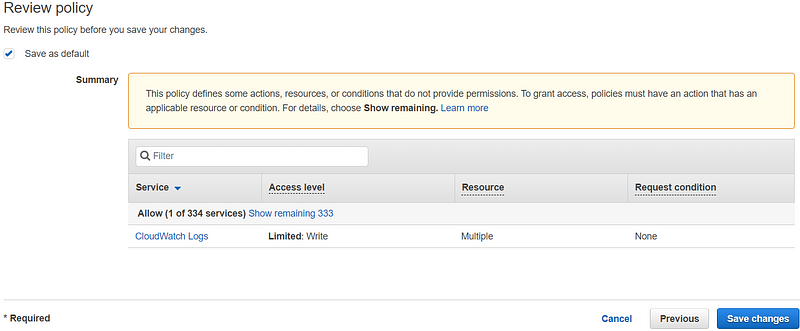
We added the SendMessage action on line 14 and specified our SQS ARN as the resource on line 17. Now, save your changes.
Afterward, return to your Lambda function and open it. Scroll down to find the code section. We need to modify this code so that Lambda can send a message to SQS.
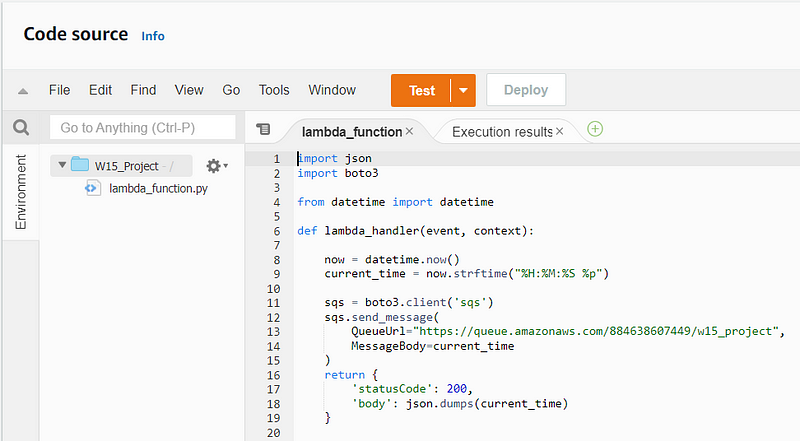
Before modifications, this is the initial code.
The following code will enable Lambda to send the current time to SQS. Remember to replace the QueueUrl in this code with the URL generated in the first step.
After updating the code, click on deploy to apply the changes. Then create a test event.

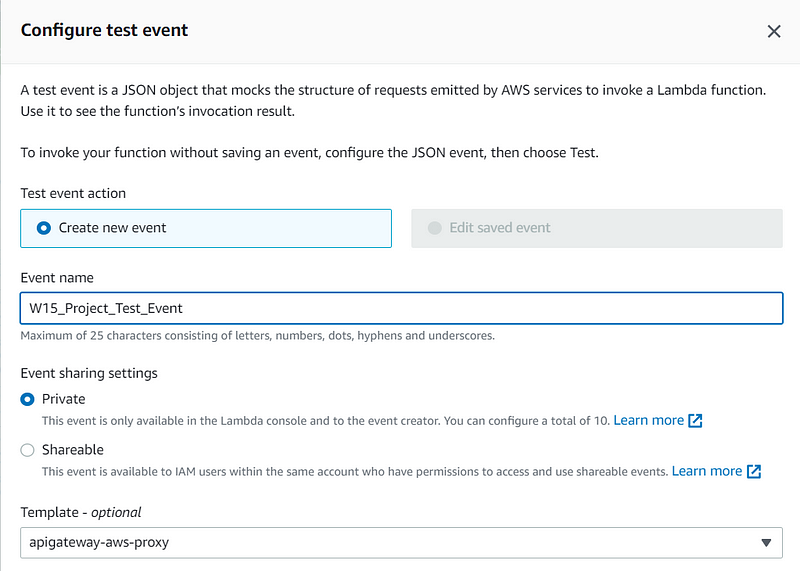
Ensure you change the QueueUrl to the URL printed earlier. Create a new event, name it, and select the apigateway-aws-proxy template. Finally, scroll down and hit save.
Let’s run the test.
In the Response section, you should see that the statusCode indicates success and the body displays the time.
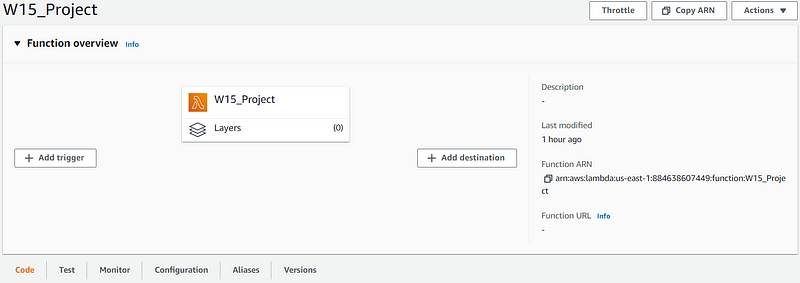
Now, we will create an API Gateway and set up an HTTP API trigger. Scroll back to the top of the page and click on “Add trigger”.

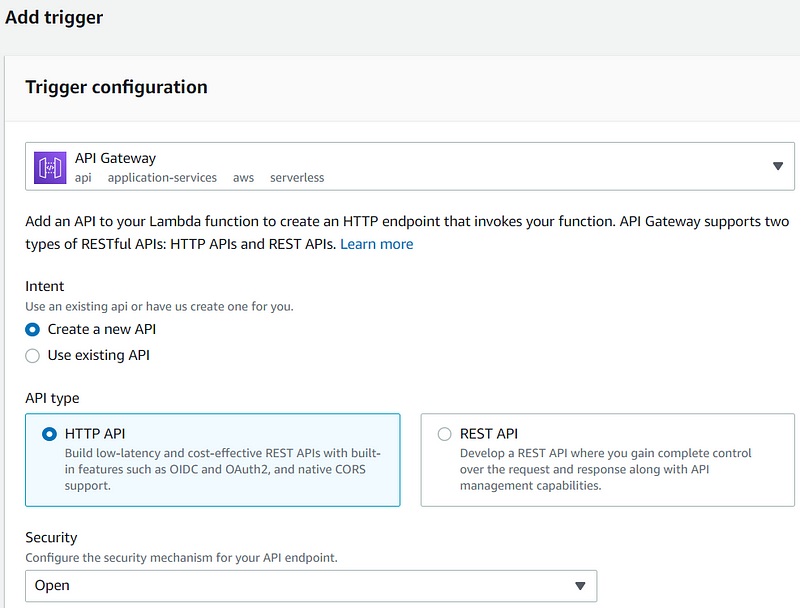
Select API Gateway, create a new API, choose HTTP API, and set security to open. Then, scroll down and click add.
Now, we need to verify if the message was sent. Copy the API endpoint and paste it into your browser.
Here’s the API endpoint.

Keep in mind that the time displayed in the browser is in UTC, so it may differ from your local time zone.
Lastly, let’s check SQS to confirm that a message has been received.

Success! A message has been received!
That's it! You have successfully created a Lambda function to send messages to an SQS Queue with the current time.
Thank you for reading! I hope this guide was helpful.
Jason Wood
@jwood9799
Chapter 2: Video Resources
Explore how to set up Amazon SQS and trigger Lambda functions using .NET on AWS in this informative video.
Learn the steps to trigger AWS Lambda from SQS in just two minutes with this concise tutorial.